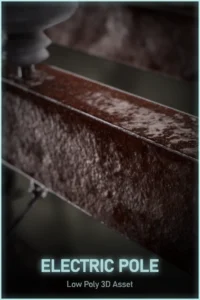
Using a high to low poly bake workflow for hardsurface, I created this Electric Pole game ready asset optimized not using Chamfer – weighted normals, using instead separate smoothing groups. Electric Pole is part of a Urban 3DModels set available soon.
I used PureRef to collect images of the different parts of an electric pole with similar proportions/forms and materials/details like dirt/rust effect and specular values, Highlight edges, etc
3D MODELING
For this model started using standard primitives like cylinders for almost all the parts, and cubes, deforming and adding loops, changing scale in edge loops, bevels for border, and insets, using extrusions for rect parts.
For the wires I used splines modifying the form with bezier helpers, for parts that rounded the pole, I just used edge loops to create the zone and detach it. Using the normals direction in the pole to position parts that should be perpendicular to it. There weren’t many chances to reduce total polys due to the cylindrical form of almost all the parts, just a few optimizations.
For high poly, for some parts that didn’t need extra high detail, just smooth edges, i first used chamfer applying according smoothing groups for more automation to create edge controls for subdivision. For the rest, I first created the extra detail, after applied the process mentioned, in some minor parts I just made manual edge control loops for subdivision. Needing to use extra edges for deformation zones.
UV MAPPING
Applied three material IDs both to increase the resolution and because of the nature of each material (Metallic, Dielectric, Concrete), UVs created in 3dsmax, setting UV islands by smoothing groups to avoid hard edges errors when baking, trying to hide seams. Reescaled island for separate in each material, then, used a workflow with reescale deactivated while packaging to respect texel density, trying, due to this, to optimize uv space and straighten borders.
TEXTURING
Into Substance Painter, When baking, I used matching by name to avoid errors at 4096 px channel maps. In some big parts I used average normals projection cage to avoid hard edges missing data, but keeping topology with its own UVs separated where the baking projects high poly details. Trying new learnings, in smaller parts I preferred to bake with average normal off, without need to use extra uv seams with not much noticeable errors. Thanks to a non destructive workflow I could go back to the mesh when baking errors were presented and fix it.
.
For concrete I used a mix of color variations, with a height alpha, excluding high poly metallic details, applying dust.
For Dielectrics I applied individual colors, height and roughness variations, using Position lighting for dust effect and using curvature/position channel maps for dirt effect.
For metallic I used effects like variation roughness, highlighted edges, height rust and a general dust
The textures were exported in 4096 x 2160 px PBR Metallic Roughness and packed for UE using Base color, Normal and ORM.
RENDERING
For Mesh Channel maps, UVs+matID and Highpoly I used substance Irray render.
IntoUE5 I created a scene with 3 point lighting setup, Key, Fill and backlight to separate mesh from background, plus a Skylight with interior studio cubemap for not to lose details.
Using theMRQ applying Pathtracing render with denoiser and antialiasing.
For the enviroment render, I used Deferred plus nanite/Lumen render using theEnvironments Bundle 6 Maps Project bySnowyTrain Market, Neon city map, to try to capture ingame.